Friday, January 25, 2013

Washi tape phone cover

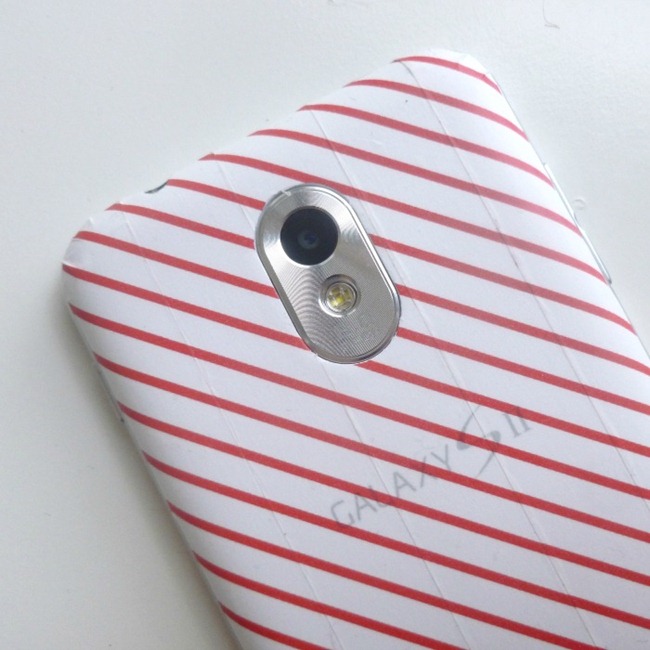
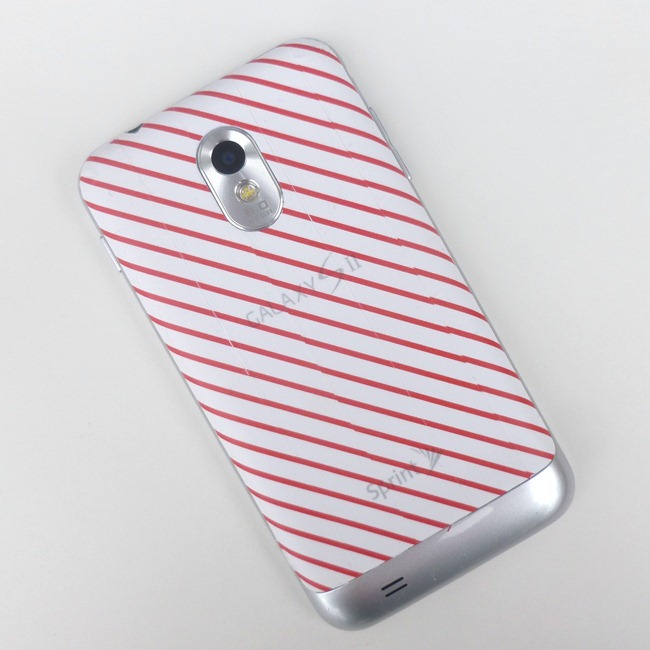
washi tape phone cover tutorial


I saw this and thought, “why not?” Washi tape is so dang popular that it’s been used to cover everything!  It’s like the classier cousin of duct tape.

I’ve been having this tutorial in my archives for quite sometime and I had a moment to write it up and publish it.


washi tape phone cover

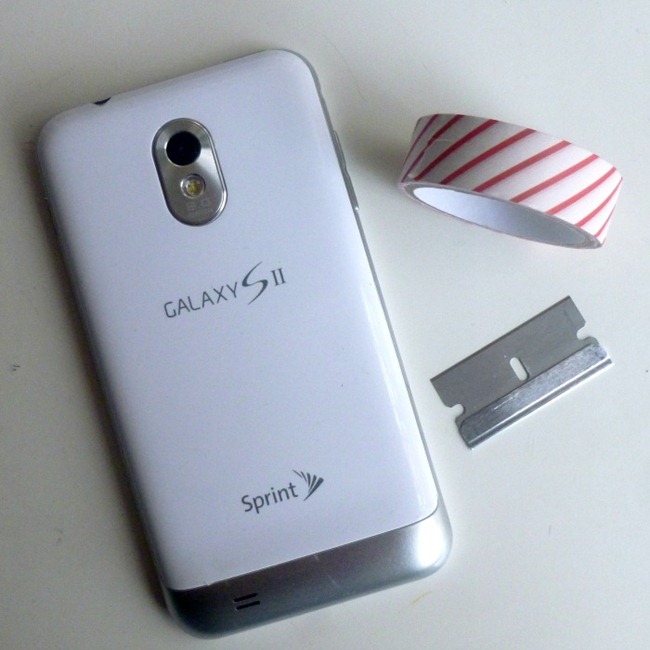
This is a quick little project and all you need is a roll of washi tape and a razor blade.


washi tape phone cover 1

Depending on your phone, you may have to take off the back cover.  I know you iPhone users don’t have a removable battery so this wouldn’t apply to you.

washi tape phone cover 4

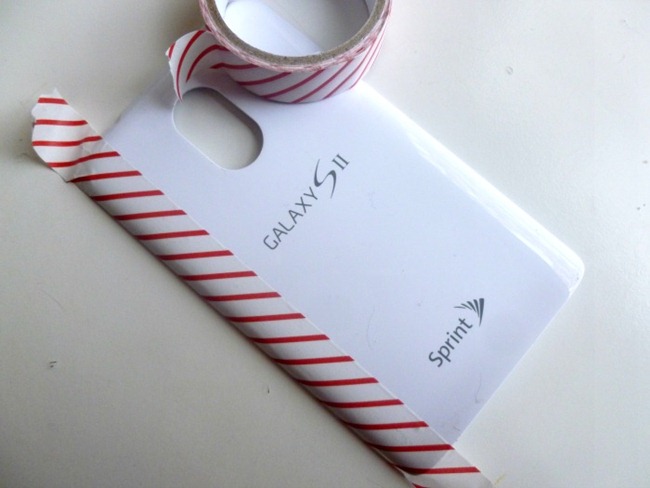
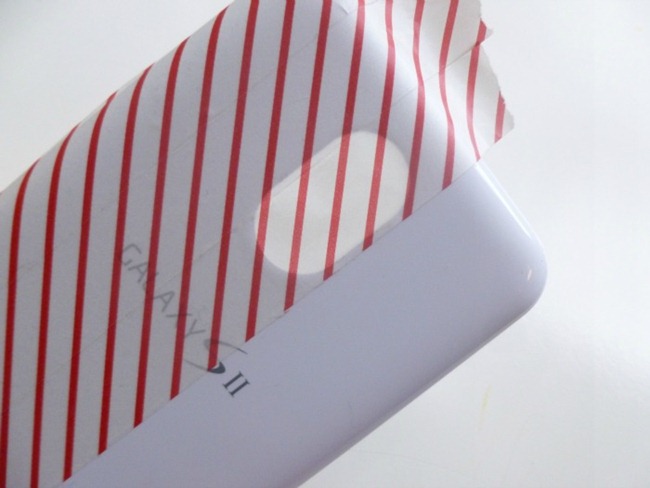
Start on one side or start in the middle.  Either way is fine, just be careful to follow the pattern on your tape if needed.  Leave a little extra hanging off the ends.

washi tape phone cover 5

Don’t worry about holes and extra tape, you’ll trim that at the end.

washi tape phone cover 6

Using your razor blade, trim off the excess and any holes you have.

washi tape phone cover 8

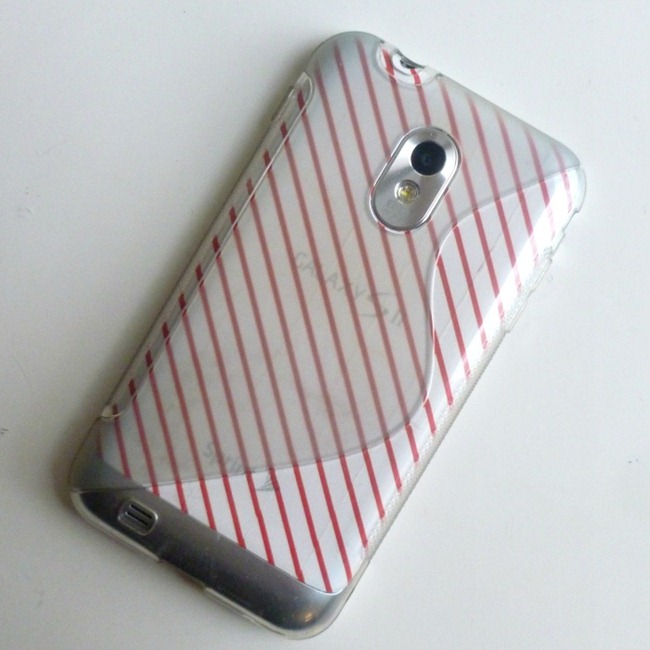
I have a clear rubber case for my phone so you can still see the tape through it and it helps to protect the tape from dirt and rubbing.  If you don’t have a clear case, no worries, you can give it a coat of modpodge or clear nail polish to give it some protection.

washi tape phone cover

And… done!  Happy crafting!

Wednesday, January 23, 2013

Hand-carved stamps

stamp of me

With having a full-time job now, crafting is something I have little time for.  Back when I was home all day, I had more time to keep up with my beloved blog and could work on projects and tutorials.  Now-a-days I only have time on the weekends to do things I love.  (I also don’t have time to style photos to be “blog-worthy” either.)

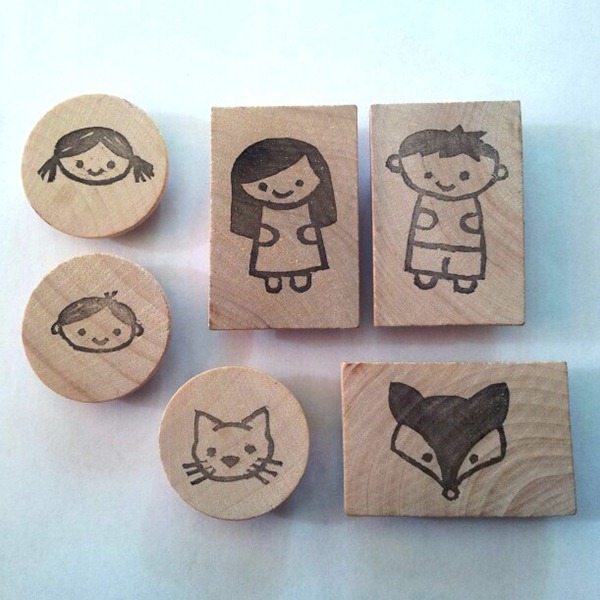
My latest endeavor has been stamp making.  My mother got me carving tools and rubber for my birthday and since then I’ve been hooked!  Here’s a little of what I’ve been making in my spare time.

hand-carved stamps

little boy and girl stamps

boy and girl stamps

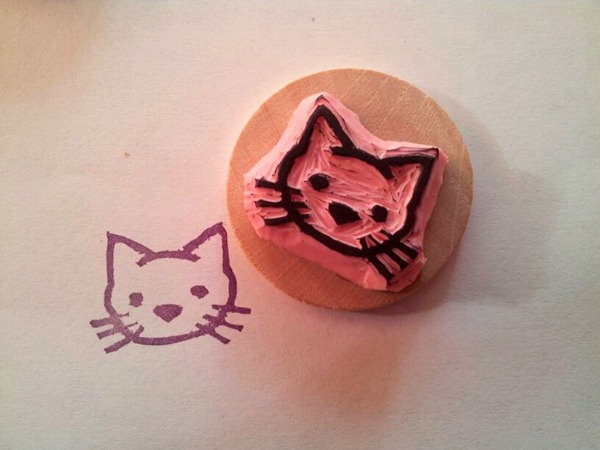
kitty stamp

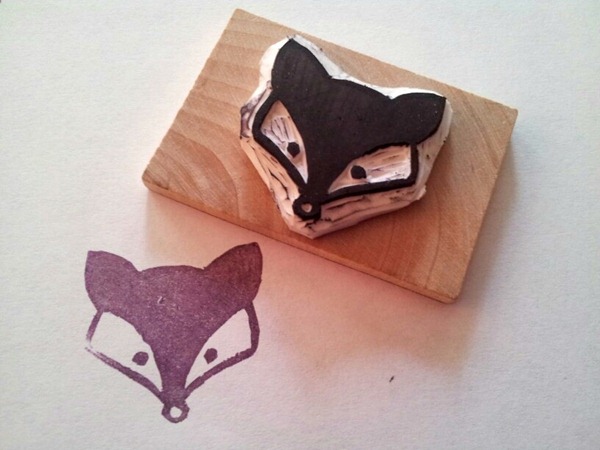
fox stamp

I’m still only a novice but here’s a little of what I’ve learned so far:

  • Speedball products are pretty good.  It seems like that’s what a lot of people use who carve stamps.  The pink rubber is way better than the blue.
  • Take your time.
  • Etsy is great place to start when looking for beginner kits.  This is what I got to start with before I moved to the Speedball stuff.  I still use the tools just as much.
  • YouTube has a great how-to videos.  Here’s one that I liked.
  • Don’t be afraid to dig in! (Pun intended!)

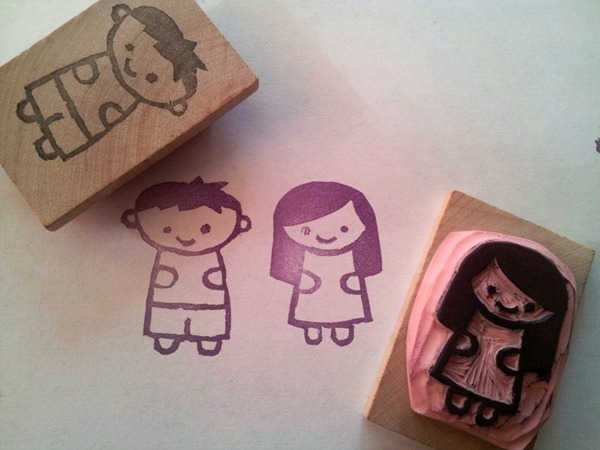
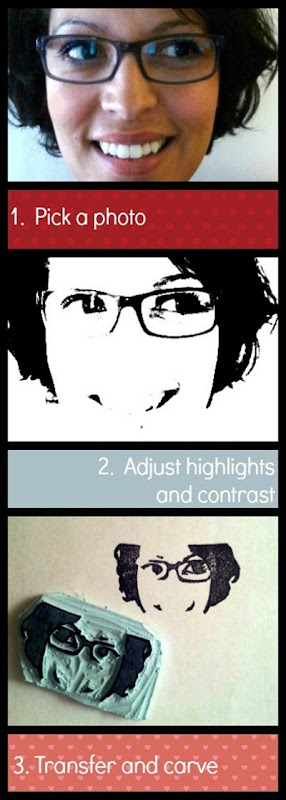
I’m also including a little “Pin-worthy” photo of how I created the stamp I did of myself.

how to hand-carve a stamp from an image

I hope this inspires you to create your own stamps.  It really is fun and you just may surprise yourself!

Friday, January 4, 2013

Free Valentine Printable

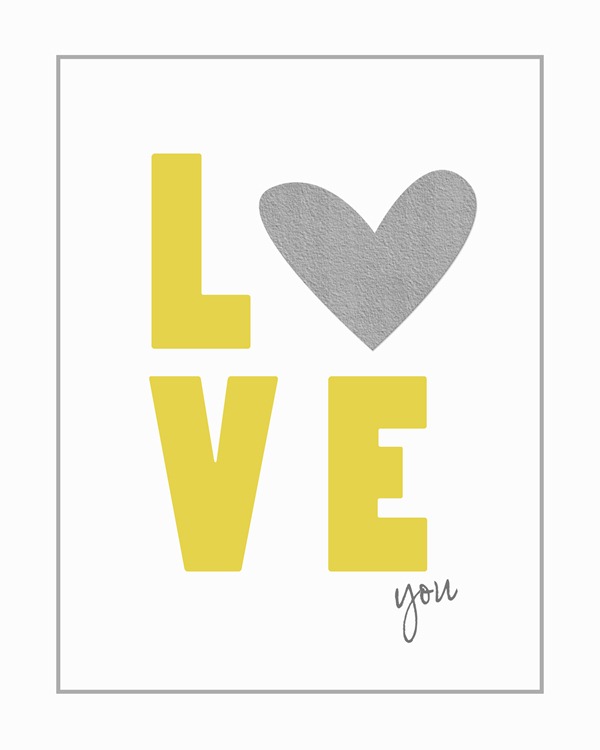
iloveyou_8x10

Thanks to good ole Pinterest, I found this pretty Valentine print that is offered for free from Persnickety Prints.  Wasn’t that sweet of them? <3


My boyfriend has a wireless printer that you can email stuff to directly and it will print the attachment.  I think I’ll download this little lovely and have it delivered to his printer.  Thank you technology!

Sunday, October 7, 2012

Shop Handmade

shop handmade

By now, I think most people have at least heard of Etsy.  The handmade marketplace is certainly growing and it’s amazing to see all the creative talent there is out there.  I read some interesting facts about Etsy and it's growth here on the Flourishing Abode.

Picking out the perfect gift for someone is something I really enjoy and today I wanted to take the time to remind you all to consider buying handmade for all your gift giving this holiday season. It’s almost impossible not to find that perfect gift for someone on Etsy.   
I got to thinking.  Pinterest and Etsy would go great hand-in-hand for holiday shopping.  Just about everyone you know is on Pinterest, right?  Why not ask your friends and family to create a pin board wish list and Etsy is the perfect place to start.  Etsy is full of beautiful photos and if pinned correctly, it’s linked right to the place to buy it and the price is listed right there on the pin.
Are you new to Etsy or are you interested in exploring new shops? Here is a list of some of my favorite shops on Etsy.
the Merriweather Council
The Merriweather Council
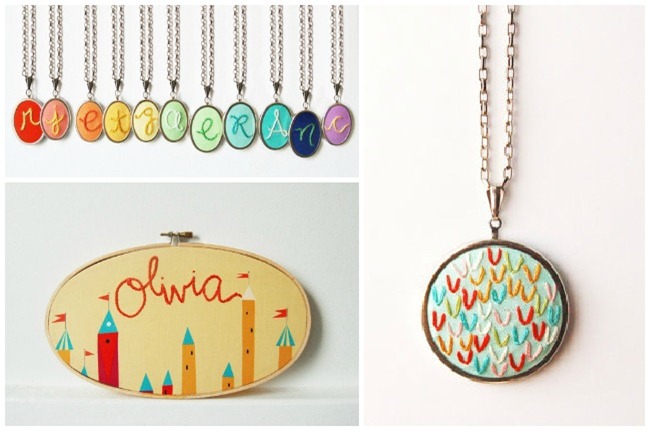
I was just introduced to this shop recently through April Starr of Flourishing Abode. How could I have missed such a wonderful place? She has all sorts of brightly colored and fun embroidered necklaces! These aren't your grandmother's embroideries! She makes necklaces, personalized wall art and Christmas ornaments.  I can’t wait to own one for myself!

Flourish Cafe
Flourish Cafe
April Starr has to be one of my all time top fav people of this decade! She runs a fabulous blog called the Flourishing Abode, she's the owner of this great Etsy store and she contributes her awesome knowledge all over the internet these days. She has a blog definitely worth reading.

Fabric Paper Glue
Fabric Paper Glue
Here is another of my fav people, the cutest little pixie fashionista I've ever seen. Mandy of Fabric Paper Glue has such a great signature style that you can find in her shop or on her blog where you are sure to fall in love with her too. Any item in her shop would be a nice gift for the fashion forward gal in your life.
clockwork universe

Clockwork Universe
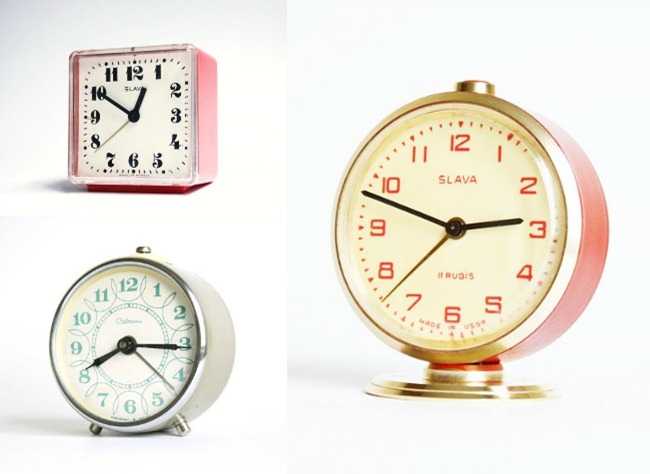
Follow me on Pinterest and it won’t take long to figure out that I’m so in love right now with vintage clocks. I’ve got a few favorites on my list from this shop, they’re all so handsome.  I don’t think I could ever pick just one.  Most of these are from the Soviet Union period.  I love this little bit from the seller’s profile, “The Clockwork Universe is a theory, established by Isaac Newton, as to the origins of the universe. A "clockwork universe" can be thought of as being a clock wound up by God and ticking along, as a perfect machine, with its gears governed by the laws of physics.”
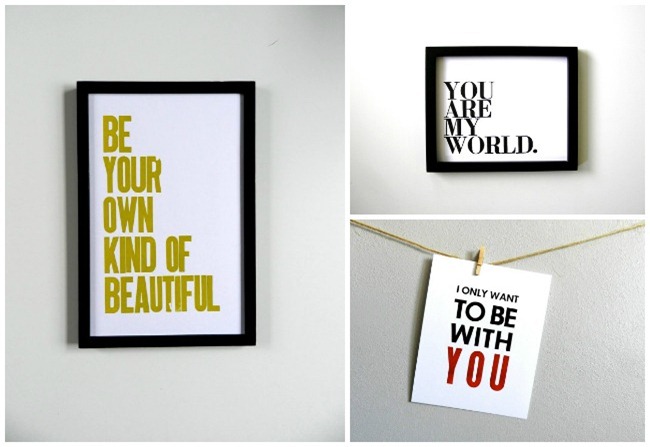
Happy Deliveries
Happy Deliveries
Oh how I love Letterpress!  I especially love this shop’s story of it’s name.  These prints make great gifts for the hard to shop for person.  I bought a print from Happy Deliveries a while back for my pastor’s wife when she was pregnant.  It said, “Before I formed you in the womb, I knew you.”  Beautiful addition to a nursery, the print came quickly and packaged with great care.  I can’t wait to finally have one for myself.

Bean Forest
Bean Forest
Bean Forest has a crazy large selection of fun and quirky pins perfect for stocking stuffers or small gifts.  You may have a lot of fun reading through each of his hilarious pins and find yourself ordering a few for yourself.  I have many of his buttons and I’m always seeing more I want.  If you head over to his shop, reserve about an hour to read through and laugh at some pretty funny stuff.
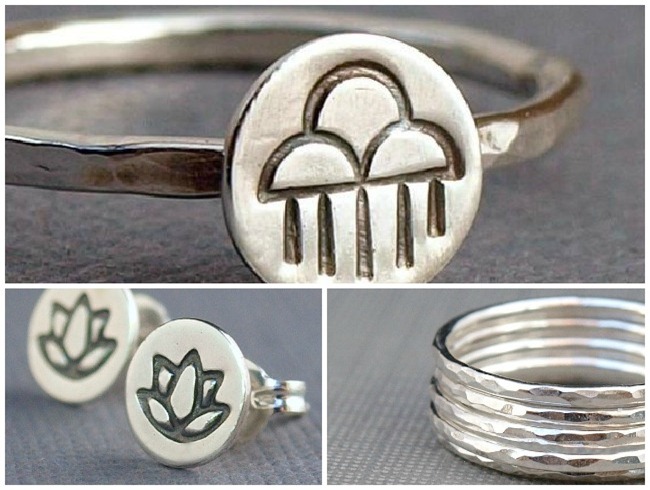
Catherine Marissa
Catherine Marissa
What woman doesn’t like jewelry?  I love these dainty pieces in her shop and I would love to add them to my jewelry collection.  The selection in her shop makes it easy to pick out the perfect gift because any of these sweet pieces would work for dressing up or down.  You can’t go wrong in this shop!
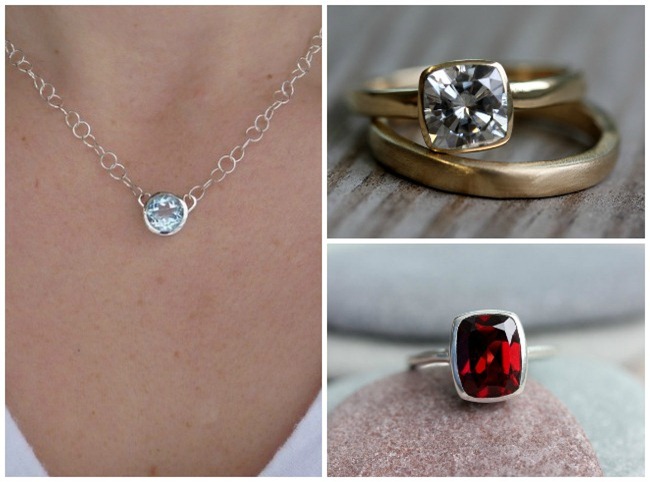
One Garnet Girl
One Garnet Girl
If I ever get married again, I would love to have one of these rings as my engagement ring and wedding band.  After awhile, all engagement rings look the same but you can’t beat a one of a kind handmade wedding set.  How special would that be?  I have my eye on a set in particular and maybe one day I’ll be wearing it.  Bonus: All her items are always shipped to you for free!
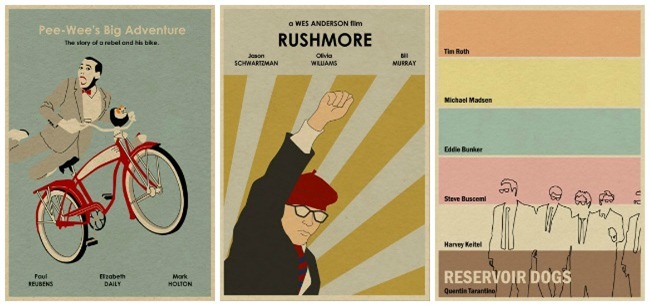
Monster Gallery
Monster Gallery
Now here’s a little something for the guys.  I’m sure one of these movie posters is your guy’s favorite film.  Mine personally is Pee-Wee, I bought that print for my boys room.  I also love all the Wes Anderson prints.  Definitely a unique addition to the man cave.
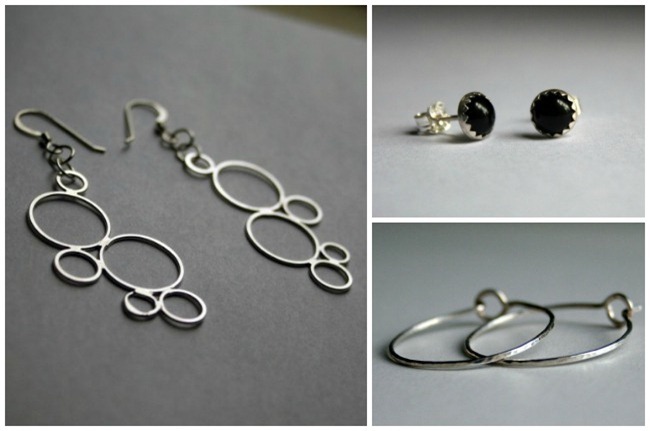
Free Forged
Free Forged
A couple years ago, I bought the little black coal earrings pictured above and they quickly became my favorite pair.  They went with everything, but one day I lost one.  I emailed the seller to tell her how heartbroken I was to lose it and if she would considered making me another.  She was more than happy to and even offered to give it to me for free with the purchase of another item in her shop.  Now that is excellent customer service!  I still wear these earrings quite often.  They are so beautiful!


I hope you’ve found a new favorite shop or two and maybe I was able to give you some ideas for gifts, too.  Who are some of your favorite shops?  Found anything interesting on Etsy lately?  Or perhaps you’ve got your own Etsy shop you’d like to share?
Feel free to share the Shop Handmade graphic on your site or blog and pin away!  Please remember to credit me for the work. ;)
 

Sunday, September 30, 2012

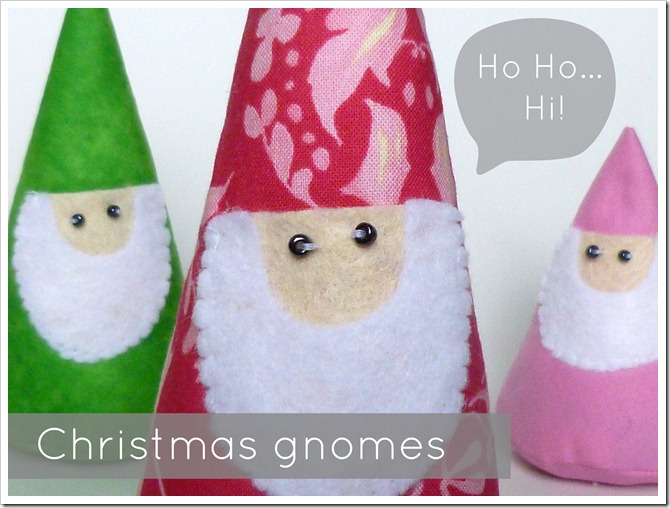
Christmas gnomes

christmas gnomes 4

Woo-hoo!  I got some much needed sewing squeezed in this weekend!  I found this super cute pdf pattern on Etsy and it’s all I could think about during the week.  I couldn’t wait for Friday.

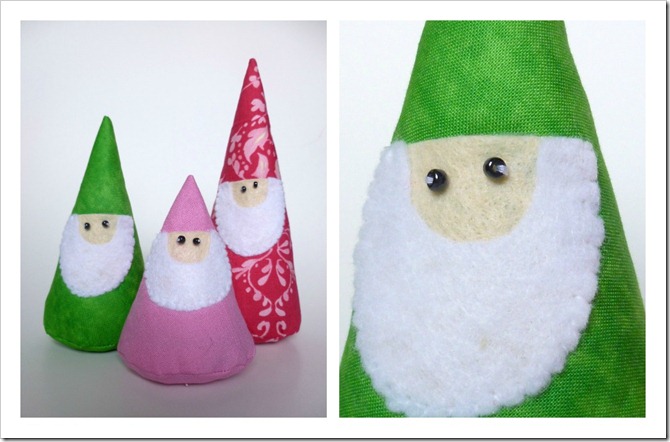
Collage

I missed out on filling my Etsy shop with Halloween treats but there’s no way I’m going to miss out on Christmas.  This pattern by Muse of the Morning is perfect for little Christmas gnomes.  The pattern is really simple and allows for embellishing.  To me, I thought they kind of looked like little Santas.

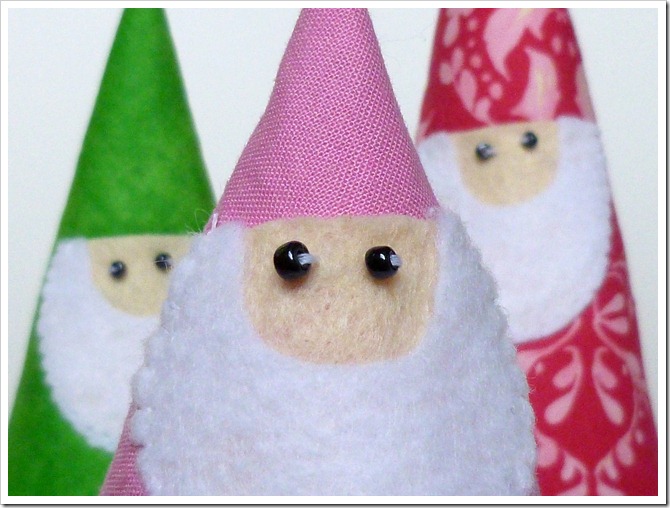
christmas gnomes 2

So I will have this cute little trio and lots of others for sale in my Etsy shop, thanks to Muse of the Morning, who so kindly allows her customers to sell the gnomes made from her pattern.
I’m playing around with different color combos for Christmas.  What colors are you doing this Christmas?  Have any ideas?
 

Monday, September 17, 2012

I’ve been missing you!


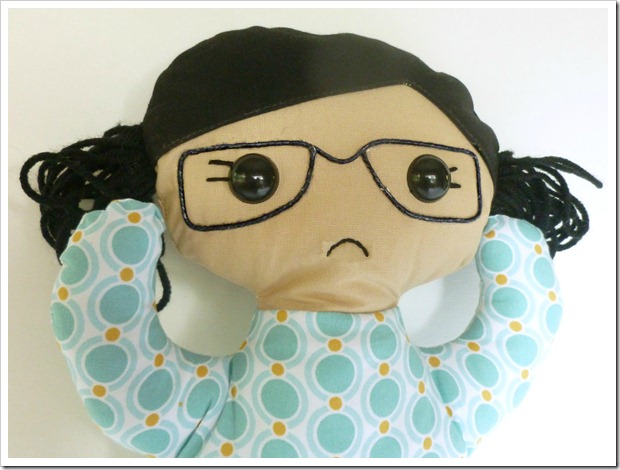
so sad

Oh my gosh! You have no idea how much I miss you guys!  I just started a new job and as much as I love it, it is sucking all of my crafting and blogging time away!  All week long I’ve been thinking of how I could sneak in a bit of creativeness and do a little post for you all but between work, school and four kids, I’ve not been able. 

I knew this was coming but I didn’t want to jump the gun and tell you that I wouldn’t be here if there was any possibility that I would still be able to swing it.  But after a week of no posts, no tutorials, not even one picture of something handmade or DIY, I couldn’t just leave you guys hanging. 

But! There is a glimmer of hope, still!  I have photos upon photos and folders after folders of tutorials and projects that I do for my blog.  In some of those folders are pictures of projects that I never posted for one reason or another.  So I may be able to post a couple tutorials or project ideas that are just sitting in those folders waiting to inspire.  And once I get acclimated to working full time and figure out how to balance my life, I hope to be back with you again.

postfolders


So what have you been doing this week?  I haven’t really even been able to be inspired.  I haven’t been on Craftgawker or Pinterest much except for the occasional peek on my phone during break at work and I haven’t been able to read my favorite bloggers either.  Have you come across anything of interest or projects that you really want to try? 

During this lull, I am inviting and encouraging you to post any crafts or tutorials you’d like from your blog.  Go ahead!  Link away!  I’d love to see what everyone has been up to.  And please, keep me in your readers and subscriptions and keep loving this blog because I promise, this is not “good-bye”, I will be back.

Friday, September 7, 2012

How to make button earrings

button earrings

Sometimes I see so many cute buttons but don’t always have a use for them.  So why not make them into earrings?  Here is probably the easiest tutorial I have ever presented to you.  You’ll want to make several of these!
 
button earrings 1

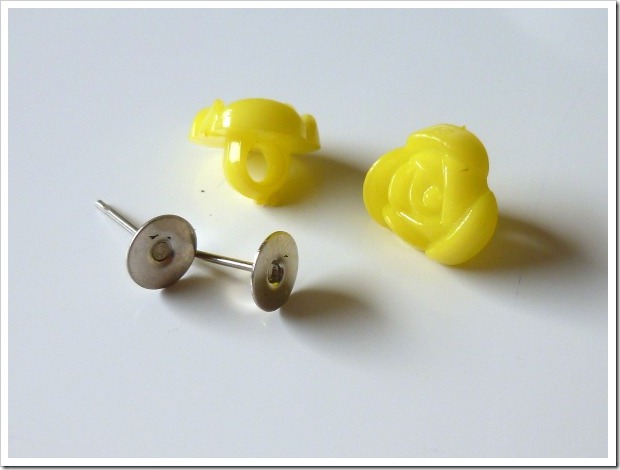
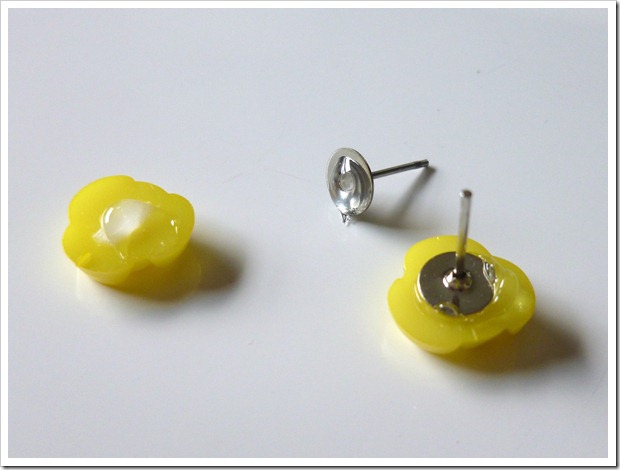
You’ll need a pair of buttons with shanks and two earrings.

button earrings 2

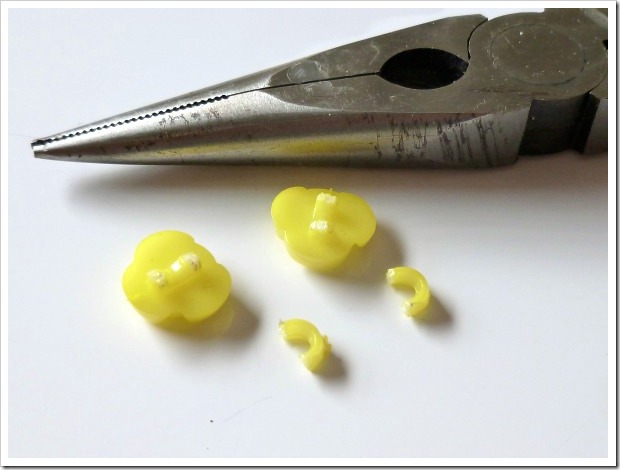
With a pair of wire cutters, snip off the shanks.  Mine didn’t get snipped all the way off.

button earrings 3

So I used a pair of nail clippers to snip off the rest.  A nail file would probably help too to get the back nice and smooth.

button earrings 4

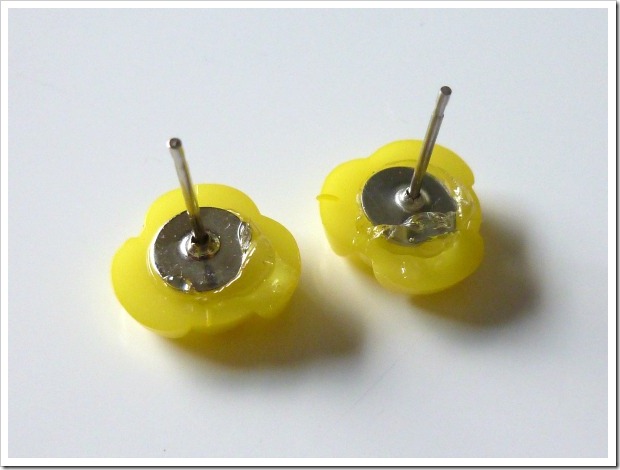
Using craft adhesive, glue the earrings to the back of the buttons.

button earrings 5

Smoosh down and clean up any of the excess glue.

button earrings
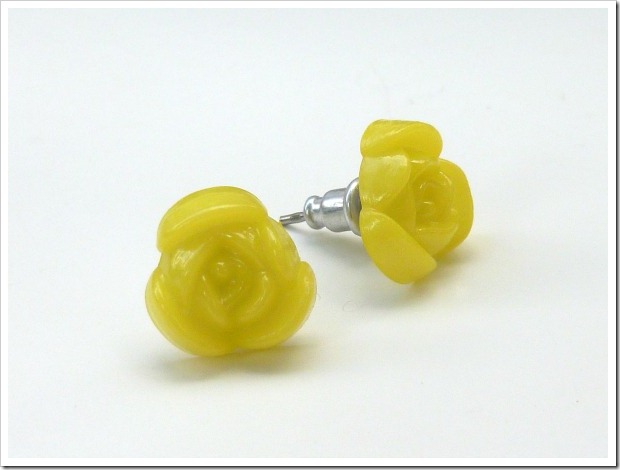
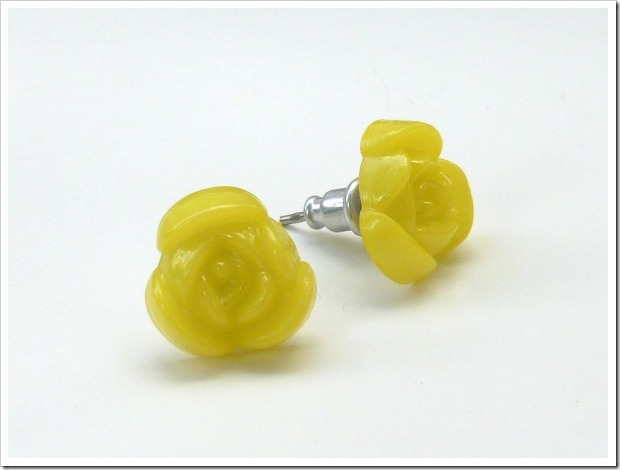
Voila!  Sweet little yellow rose earrings! 

Wednesday, September 5, 2012

Diy Flower Roundup

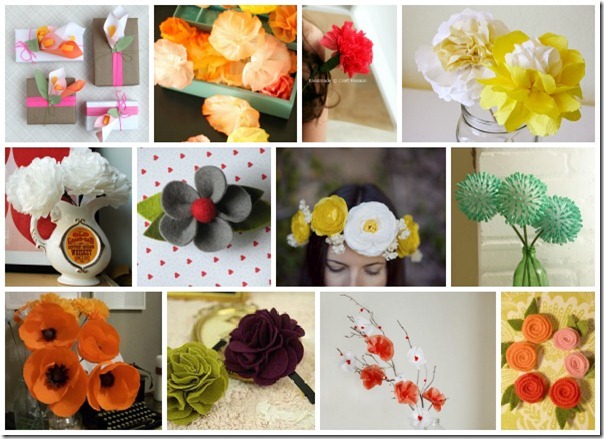
12 of the best flower DIY

I’ve been getting a lot of love lately from other awesome blogs so today I’d like to give some love away in return.

I just love diy flowers.  LOVE!  Here are twelve of the best flower tutorials I’ve come across.  By the way, I’m always pinning flowers, if you love them as much as I do you might consider following my DIY flower board on Pinterest.

So here’s where to find them.  From the top row, left to right:
1. Paper calla lilies | Oh Happy Day
2. Paper towel flowers | The Sweetest Occasion
3. Tissue carnation | Craft Passion
4. Simple wedding flowers | Made
Second row, left to right:
5. Coffee filter flowers | Unusually Lovely
6. Felt flower | A Hoot and a Holler
7. Flower crown | Green Wedding Shoes
8. Anthropologie inspired blooms | Homemade Ginger
Third row, left to right:
9. Crepe paper poppies | A Very Chocolate Life
10. Tshirt fabric flowers | Emily’s Little World
11. Tissue paper wedding centerpiece | Once Wed
12. Sweet sweater roses | June Pfaff Daley

Do you love flower tutorials?  Got any favorites to share or maybe you have one on your own blog?  Please don't hesitate to comment, share with us a link.

Now go have fun making flowers!!  And please don't forget to say hello to the nice ladies at these blogs who shared with us their amazing how-tos.

Monday, September 3, 2012

Notebook organizer

notebook organizer
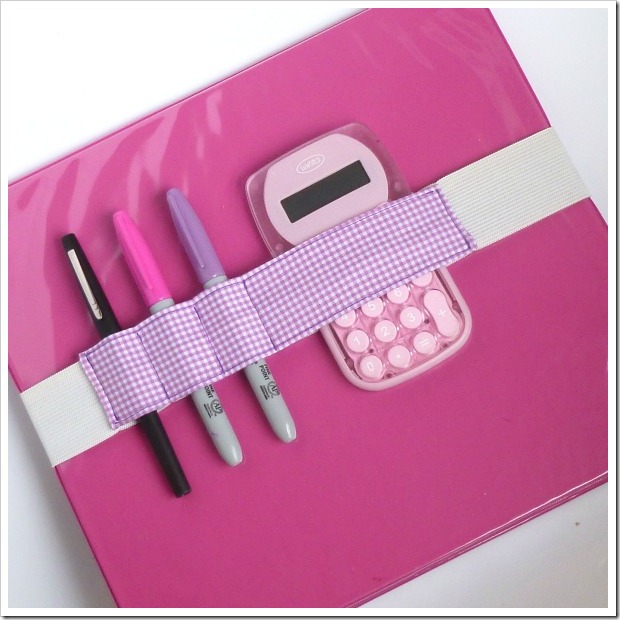
K&Company Smash* has some really cool crafting accessories at Wal-Mart right now and I recently stocked up on some washi tape and page tabs that they have.  I also saw this elastic pen band that they have to slip over your journal and it holds your pens.  I thought the idea was brilliant and it wasn’t really expensive but I have a general rule that I don’t buy things that I can easily make.
So I figured out how to make one for myself and now I want to show you how to do it too.  It’s probably not going to save you any money to make one yourself but if you already have the supplies on hand to do it, you might find it’s worth it to make one.
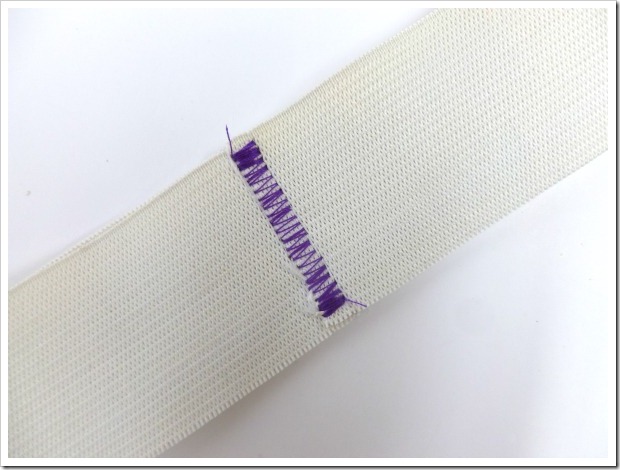
stitch together elastic
I used a piece of 1.5” wide elastic and slightly stretched it around a notebook.  I cut it to size, joined the ends and zigzag stitched it together.
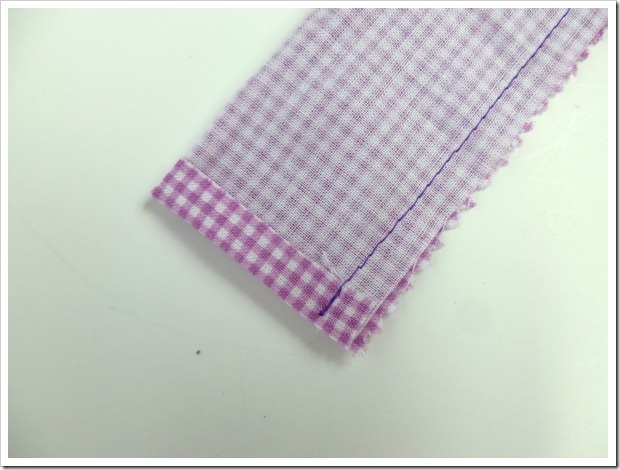
fold and sew
For the fabric I cut a piece out at 3.5”W x 8.5”L.  Fold in half lengthwise and stitch down the edge using the end of the presser foot as a guide.  The ends were folded in a quarter of an inch so that when I turned it right side out, the raw edges would be neatly tucked inside.
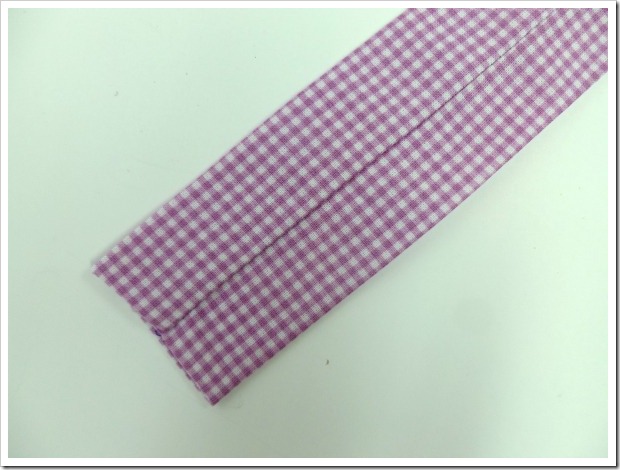
press seam in middle
I pressed the strip with the seam going down the middle so it wouldn’t be seen in the finished product.
top stitch sides
I top stitched both long edges just for good measure.
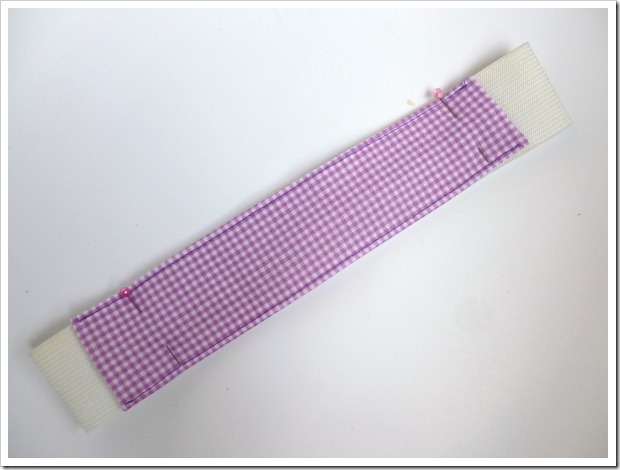
pin onto elastic
Then I laid the strip down on top of the elastic with the seam lying against the elastic and pinned in place. 
notebook organizer 2
Then I sewed the ends across and a few more stitches about an inch apart to make room for pens, markers or pencils.  I left a large part open for a calculator or other larger item that might need to be toted around.
Now everything is held in securely and of course, pretty and personalized!  Hope you find use in this project!

ShareThis

LinkWithin

Related Posts Plugin for WordPress, Blogger...